So you logged into Blooket and landed on a screen full of tabs — Discover, Create, Market, something called a Blook — and none of it is immediately obvious. If you’re wondering how to use the Blooket dashboard, you’re not alone; almost every new user hits this same wall of unfamiliar labels on their first login. This guide walks through exactly what each part of the dashboard does, so you can go from confused to confident in a few minutes.
What Is the Blooket Dashboard?
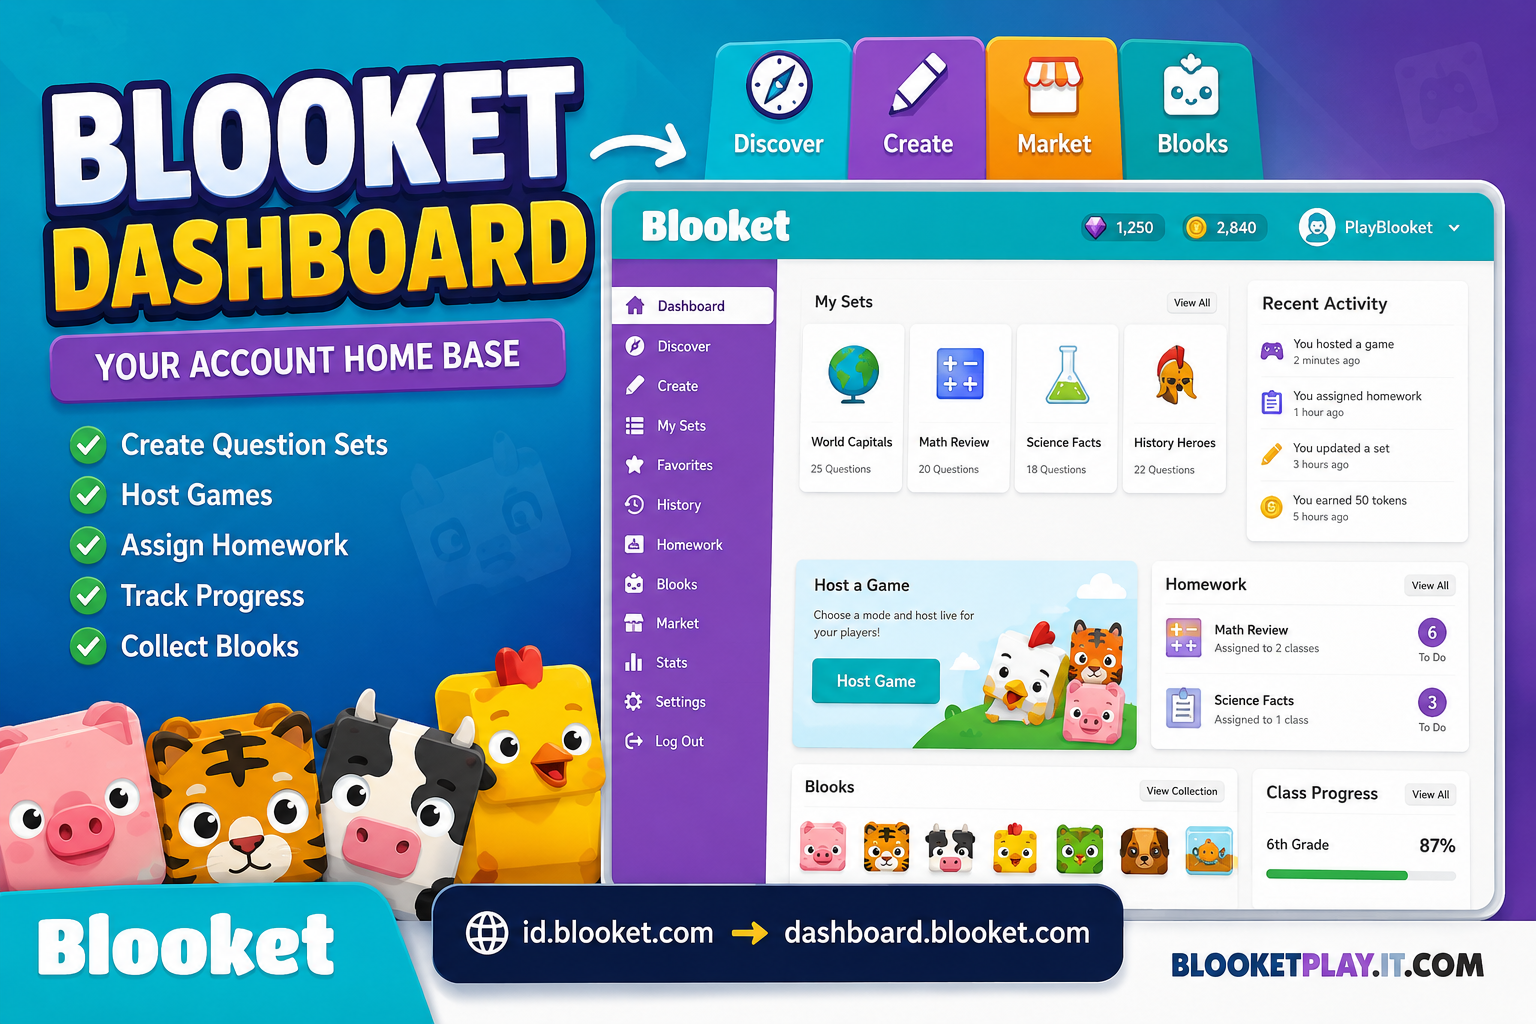
The Blooket dashboard is your account’s home base. After you sign in at id.blooket.com, you’re redirected to dashboard.blooket.com — this is the one screen where nearly everything happens. From here, you can:
- Create and manage question sets
- Host live games as a Blooket host
- Assign homework for students to complete on their own time
- Track progress and past game results
- Collect and manage your Blooks
Rather than being scattered across separate pages, Blooket keeps all of this centralized in one dashboard, which is convenient once you know your way around — but a little overwhelming the first time you see it.
Breaking Down Each Tab
Discover
The Discover tab is where you browse question sets other users have created and made public. If you’re teaching a topic that’s common — a grade-level math unit, a popular novel, a standard science concept — there’s a good chance someone has already built a set you can use as-is or adapt. This is usually the fastest way to get started without building your own content from scratch.
Create
The Create tab is where you build your own question sets from the ground up. You’ll add questions, answer choices, and correct answers, and once it’s saved, it becomes something you (or others, if you make it public) can host as a game. This is the tab you’ll use most if your content is specific to your own curriculum or class.
Market
The Market is where Blooks — the collectible characters tied to gameplay — come into play. Using tokens earned by playing games, you can purchase themed packs from the Market for a chance at new Blooks. It functions similarly to a rewards shop: the more you play, the more you can spend here.
Blooks
This is your personal collection screen, showing every Blook you’ve unlocked so far, along with duplicates and rarity tiers. Some players are motivated purely by gameplay, but for others, working toward a complete Blook collection becomes its own goal alongside the actual learning content.
Hosting a Game from the Dashboard
If you’re the one running a session — most often as a teacher, but the role is open to anyone — you’re acting as the Blooket host. From the dashboard, hosting a game generally works like this:
- Choose a question set (either one you created or one found via Discover)
- Select the “Host” option to begin game setup
- Pick a game mode and adjust your settings
- Launch the game and share the generated join code with your players
- Monitor progress from the dashboard while the game runs
Everything a host needs — sets, hosting controls, and progress tracking — routes back through this same dashboard, which is why getting familiar with it early pays off.
Assigning Homework
Beyond live hosted games, the dashboard also supports assigning homework: a question set that players complete on their own time rather than in a live session. This is useful when you want the review benefits of Blooket without needing to schedule a synchronous class session. Homework assignments are managed and tracked from the same dashboard as everything else, so results show up alongside your live game history.
Tracking Progress
If you’ve hosted games or assigned homework, the dashboard also keeps a record of past activity. This makes it easy to look back at how a group performed, spot commonly missed questions, or compare results across multiple sessions — useful if you’re using Blooket as a recurring review tool rather than a one-off activity.
Tips for Getting Comfortable with the Dashboard
- Start in Discover before building your own set. It’s often faster to find something close to what you need and tweak it than to start from a blank question set.
- Don’t ignore the Market. Tokens accumulate naturally from gameplay, so periodically checking the Market keeps your Blook collection growing without extra effort.
- Use homework assignments for asynchronous review. If class time is tight, this lets students engage with the content without needing a live hosted session.
- Revisit past game data. The dashboard’s history isn’t just for record-keeping — it can highlight which questions consistently trip students up.
Frequently Asked Questions
Do I need a paid account to access the dashboard? No — a free account gives you access to the dashboard, including the Create, Discover, Market, and Blooks tabs, along with hosting capability.
Where do I sign in to reach the dashboard? You sign in at id.blooket.com, which then redirects you to dashboard.blooket.com — this is your main account screen going forward.
What’s the difference between hosting a game and assigning homework? Hosting runs a live, synchronous game with a join code that players enter in real time. Homework is completed independently, on the player’s own schedule.
Can players see the dashboard too? No. The dashboard, including host controls and progress tracking, is only visible to the account holder running the games — players only see their own gameplay screen when joining.
Final Thoughts
The Blooket dashboard looks like a lot at first glance, but each tab has a clear, specific job: Discover for finding content, Create for building your own, Market and Blooks for the collectible side of things, and hosting controls tying it all together. Once you’ve clicked through each section a few times, navigating back to host a game or check on a Blook collection becomes second nature.